Custom-Fit Face Masks Project

DIY Custom-Fit Face Masks
Practice makes perfect, isn’t that how it goes? Our latest face mask patterns address comfort and fit, and they look pretty darn professional, too. While there are many mask styles out there, a mask that truly fits your face is a wonderful thing! Our in-depth guides, instructions and patterns are a great resource to make your best – and hopefully last – face mask.
Supply List
- 1/4 YD Cotton Fabric (or 1 fat quarter)
- Dritz 4mm Face Mask Elastic – 14”
- Dritz Bias Tape Maker (or 30” pre-packaged double-fold bias binding)
- 6” Wire – 18-22 gauge fabric-wrapped floral wire (or pipe cleaner)
- Dritz Tape Measure
- Omnigrid 8-1/2” Fabric Scissors
- Omnigrid 6” x 24” Ruler
- Omnigrid 45mm Rotary Cutter
- Omnigrid 18” x 24” Cutting Mat
- Straight Pins
- Iron and Pressing Surface
- Sewing Machine and Thread

Step 1: Print the instructions/measuring guide document and follow the instructions to measure your face.

Step 2: Print the mask sewing pattern and cut the pattern to size using your face measurements from step 1 of the instructions.

Step 3: Use the pattern to cut 2 sets of fabric (2 pieces for the lining and 2 pieces for the outside of the mask).

Step 4: Stitch the darts. Mark darts on the wrong side of cut fabric pieces. Fold each cut piece right sides together along the center line of the dart. Stich from the edge to the point to finish each dart.

Step 5: Press the darts toward the bottom of the mask.

Step 6: Pin each fabric set with right sides together.

Step 7: Pin the sets of fabric together at the nose seam.

Step 8: Stich the nose seam through all layers with ½” seam allowance.

Step 9: Trim nose seam to 1/8”.

Step 10: Press the nose seam to the side.

Step 11: Stitch the nose seam 1/8″ from seam on same side as seam allowance.

Step 12: Topstitch the darts. Starting at side edge topstitch darts through all layers. At point of dart, pivot, stitch 3 stitches, pivot again and stitch parallel to dart seam to edge of mask.

Step 13: Use tool to make binding. Cut bias strips 1-7/8″ wide and use a bias tape maker to form binding following the usage instructions.

Step 14: Press long edges of the binding together aligning folded edges.

Step 15: Stitch side binding. Stitch binding to short edges by topstitching close to inner folded edge.

Step 16: Trim binding flush to top and bottom mask edges so the inside of your mask looks something like this.

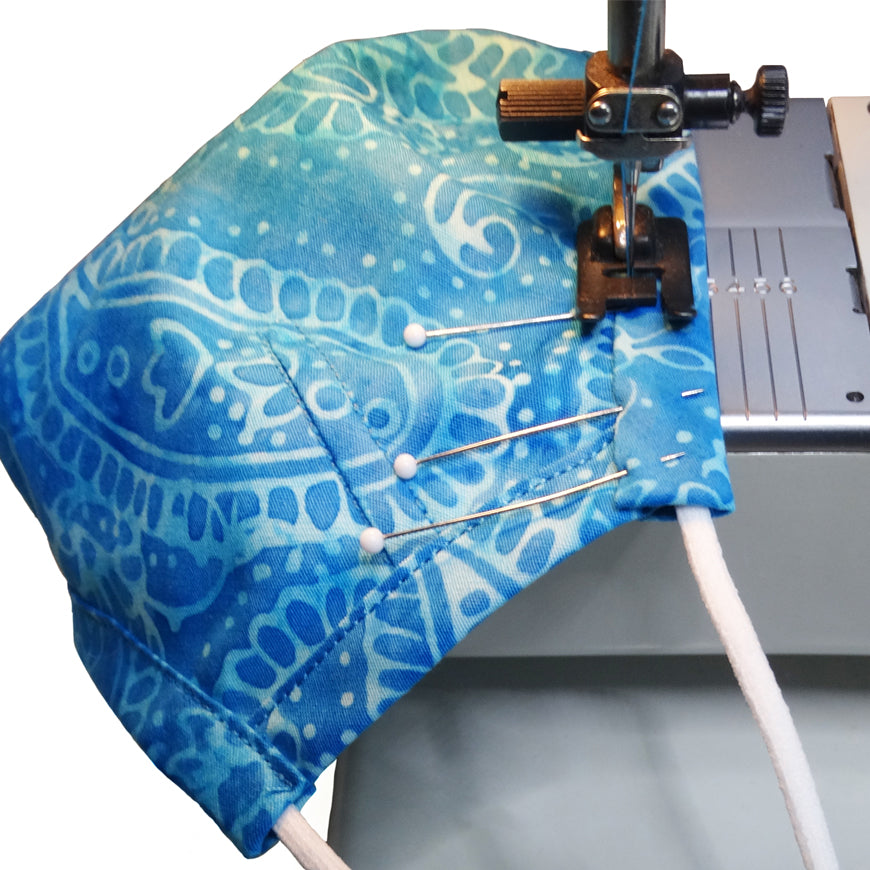
Step 17: Stitch elastic. Pin elastic so it loops away from the mask. Ends should cover side binding and be parallel to top and bottom edges. Zigzag elastic in place.
Tip: If elastic starts to creep or stretch under presser foot, stop with the needle in the fabric, raise foot and lower it again; continue stitching.

Step 18: Fold ends of wire 1/2″ on each side; bend slightly as shown.

Step 19: Attach wire. Center wire at top edge of mask. Using a zigzag stitch set at 3 wide by 3 long, zigzag slowly over wire. Use caution as wire can flip. Do not hit wire with machine needle.

Step 20: Fold binding to attach. Fold ends of binding in 1/2″ and pin to top edge of mask.

Step 21: Pin top binding. Binding should completely cover wire and elastic. Carefully pin so edges folded inside binding are not visible.

Step 22: Topstitch top binding. Topstitch along inner folded edge of binding, being very careful not to hit the wire with needle as you stitch.

Step 23: Stitch bottom binding. Pin and stitch binding to bottom edge of mask, making sure elastic is covered and all stray edges of the binding are tucked inside.

Step 24: You’re done! This is what your finished mask should look like.

Step 25: Add a lanyard and keep that mask handy during mask breaks. Follow this easy tutorial to make one. If you have children who need masks for school or other indoor activities use this instructions/measuring guide combined with this face mask sewing pattern that is designed for children. Follow all of the same steps as above.

Finally, stay safe out there! For the times you do need to wear a mask, this pattern really addresses how the mask fits your face, how it feels when you wear it, and how it looks!


